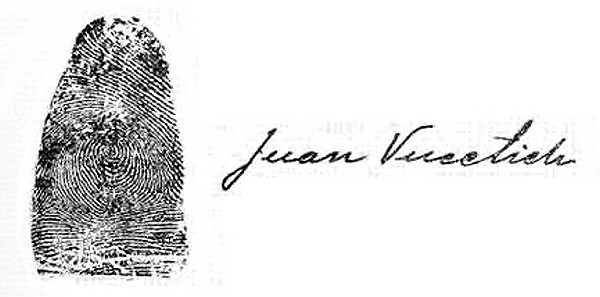
Though fingerprints were not used as unique identifiers until more recent times, they were used in ancient Babylon, China, and Japan to prevent forgery, keep records of crimes, and authenticate important documents. Centuries later, in 1684, English scientist Nehemiah Grew was the first to publish papers on the ridge structure of fingerprints while Scottish surgeon, Dr. Henry Faulds,was the first person to publish papers on the usefulness of fingerprints for identification. Then, Argentine police officer, Juan Vucetich was first to file and record individuals' fingerprints and later created the world's first fingerprint bureau. In 1902, the case of murderer Scheffer was the first time fingerprints were used to arrest and convict a criminal. A year afterward, Alphonse Bertillon created a way of pulling fingerprints off of smooth surfaces.
2. Types of Fingerprints:
1. Direct/Patent/Exemplar: These are obvious to the human eye and are caused by foreign material being transported from a finger to the solid surface. Some common ones are from flour, wet clay, ink, dirt, or blood.
2. Latent: As latent means "hidden" or "invisible", these prints are seen using electronic, physical, or chemical processing techniques. These may show only a portion of the fingerprint and may be smudged and unclear.With these factors, it is very easy to err in identification with these prints.

3. Plastic: These occur when a print's impression is left in a material that retains the friction ridge's shape. A perfect plastic print would be left in a lump of wet clay, though this is uncommon because few criminals would be so foolish. They are most commonly seen in melted candle wax, putty removed from a window pane's perimeter, or in the grease of car parts. These are easily seen with no enhancement, but one must be careful to not overlook accomplice's latent prints, as well.

4. Electronic: There was one reported instance of a criminal selling stolen watches and sending their images via cell phone; these images included his prints seen in enough detail for him to be identified by the police.

3. Techniques/Chemicals Used to Develop Prints:
Prints are typically lifted from hard, smooth or nonabsorbent surfaces via the usage of powder while prints on soft and porous surfaces are developed using chemical treatments.
Powders:The powder chosen should always show the most contrast with the surface to be examined. Many find black and gray powders to be satisfactory for lifting most latent prints. The black, which consists of carbon or charcoal is applied to light-colored surfaces; the gray, made up of aluminum dust is used on dark-colored surfaces, along with mirrors and polished metals due to the fact that they will photograph black. These are lightly applied with either a fiberglass or camel-hair brush and stick to residues of left behind body oils. Another way is with magnetic-sensitive powder, which is used on magnets using a Magna Brush. This decreases the chance of damaging prints because this type of brush does not have surface-touching bristles. Another method is the usage of fluorescent powders, which fluoresce under ultraviolet light.

Chemicals:The oldest method is that of iodine fuming, which is based on the sublimation of iodine. Iodine is a solid crystal that when heated is transformed directly into a vapor, entirely skipping the liquid phase. The material under inspection is typically placed in an enclosed cabinet along with the iodine crystals and heated, wherein the iodine vapors combine with the constituents of the latent print and are made visible. However,they are visible only temporarily and must be doused with a 1% solution of starch in water, which will then last from several weeks to several months. Another common chemical utilized is silver nitrate, which, after application, is developed with ultraviolet light. This is possible due to the chemical reaction between sodium chloride and silver nitrate which forms the colorless silver chloride.After a 3% solution is brushed onto this, the print will appear as a reddish-brown or black color. Ninhydrin (also known as triketohydrinene hydrate) depends on the chemical reaction to form purplish-blue color from the amino acids present in trace amounts of perspiration. A 0.6% ninhydrin powder solution with a fitting solvent, such as acetone or ethyl alcohol, is sprayed onto the surface. The prints appear within a couple of hours and can be quickened by heating. Another way is Super Glue Fuming; super glue is 98 to 99% comprised of cyanoacrylate ester, which interacts with and visualizes a latent print. The fumes may be created by daubing the super glue onto absorbent cotton that has been treated with sodium hydroxide or heating. These are encased in a chamber for roughly six hours and should produce a white print.
 |
| Iodine Sublimation |
 |
| Ninhydrin |
4. Shapes/Patterns:
Prior to computerization, manual fingerprint classification systems were used, three of the most popular being the Roscher, Juan Vucetich, and Henry classification systems. The first was developed and used in both Germany and Japan, the second was made by a previously mentioned Argentine police officer, and the final was created in India and implemented throughout most English-speaking countries. In the Henry system there are the following three major fingerprint categories:
Loops: These constitute 60-65% of prints and may be broken down into radial and ulnar loops, the former starting on the thumb-side of the finger (closer to the radius) and the latter starting on the pinky-side (closer to the ulna).
 |
| Radial Loop |
 |
| Ulnar Loop |
Whorls: Whorls are 30-35% of all prints and are broken down into plain, accidental, double-loop, peacock's eye, and central-pocket loop whorls.
 |
| Plain Whorl |
 |
| Accidental Whorl |
 |
| Double-Loop Whorl |
 |
| Peacock's Eye Whorl |
 |
| Central-Pocket Loop Whorl |
Arches: These are 5% of prints and are divided into plain or tented arches.
 |
| Plain Arch |
 |
| Tented Arch |
Ri/Rt + Rr/Rm + Lt/Rp + Lm/Li + Lp/Lr. For whorls, the first fraction is given a sixteen, the second an 8, then 4, then a 2, and finally a zero. All arches and loops are given zeroes. The numerator's and denominator's are added up using the following formula:
(Ri + Rr + Lt + Lm + Lp)/(Rt + Rm + Rp + Li + Lr). A one is then added to the top of these to prevent dividing by zero. In this example, the right ring finger and left index finger have whorls:
0/0 + 8/0 + 0/0 + 0/2 + 0/0 + 1/1, and the calculation: (0 + 8 + 0 + 0 + 0 + 1)/(0 + 0 + 0 + 2 + 0 + 1) = 9/3 = 3. This system reduces the number of prints needed to be compared, allowing one to only need to compare sets with matching numbers.
Your mix of pictures and words really made the fingerprint analysis easier and more interesting to read! (:
ReplyDeleteSome of the text is a bit lengthy and difficult to read through. Mabye find a way to better incorporate the pictures.
ReplyDeleteWonderful pictures again! For the numerous pictures of fingerprint patterns, what if you arranged them side-by-side instead of in just one row
ReplyDelete