http://onin.com/fp/fmiru/thumbprint_and_signature_juan_vucetich.jpg
http://www.forensicsrus.com/images/SupergluePrint.jpg
http://www.fingerprint.ws/images/Image0016.jpg
http://shs.westport.k12.ct.us/forensics/04-fingerprints/plastic_print_2.jpg
http://www.faurotforensics.com/images/L-4000.jpg
http://www.sciencephoto.com/image/92128/530wm/C0027887-Iodine_Sublimation-SPL.jpg
http://www.brazoria-county.com/sheriff/id/fingerprints/index.htm
http://ridgesandfurrows.homestead.com/fingerprint_patterns.html
http://www.bxscience.edu/publications/forensics/articles/fingerprinting/f-fing03.htm
http://www.ehow.com/about_6102496_forensic-science_-hair-fiber-analysis.html
http://www.numei.com/fiberfacts.htm
http://www.exploreforensics.co.uk/hair-and-fibres.html
http://www.olympusmicro.com/primer/techniques/polarized/images/olympusmono.jpg
http://www.hairdrugtestingcompany.com/wp-content/uploads/2010/10/Hair-Drug-Testing.jpg
http://www.purdue.edu/rem/rs/graphics/sem2.gif
http://www.floorsusa.com/img/RugImages/carpets/Acrylic_Fiber_PMMA_Fiber.jpg
http://en.globaltexnet.com/html/images/upload/tradeleads/318/317844.jpg
http://www.world-trades.com/photo/747/7551/pure-linen-fabric-589.jpg
http://www.ccmr.cornell.edu/facilities/contestimages/Winners08Jan/images/EllenKeene_SEM.jpg
http://theyarntree.com/store/fibersspinning/fibers/images/mongolian-cashmere.jpg
http://ecx.images-amazon.com/images/I/51VG5cgZ55L._SL500_AA300_.jpg
http://www.graphology.ws/img/2179po2.gif
http://www.clt.uwa.edu.au/__data/page/112506/fsp10_handwriting.pdf
http://www.enotes.com/handwriting-analysis-reference/handwriting-analysis
http://www.emedicinehealth.com/poisoning/article_em.htm
Saturday, December 3, 2011
Part X: Crime Scene Investigation
This was the final stage in our study of forensics, seaming together all of the components of forensics we learned about into one investigation and analysis. In this, I worked in a group of seven at Scene 3, using ten pieces of evidence found at a crime scene in order to analyze and correctly solve the crime.
Scene 3 Background: This took place at a break-in of a residence.
Exhibit 1: The first piece of evidence was a black, size 8 shoe with a 3.25 inch heel (8.5 centimeters).
 Exhibit 2: The second piece was a note torn apart, saying "Someone please help me," which matched up with the writing of Tyrese Jefferson.
 Exhibit 2A: This was another torn apart note, this one matching up with Smokey Johnson's handwriting and saying, "You will never find her."


Exhibit 3A: Ulnar loop fingerprints were found that match up with Tyrese Jefferson and Sandra O'Connor.
Exhibit 3: This was a plain whorl print that matched with Smokey Johnson.
 Exhibit 4: A gold earring was found that's post was slightly bent.
 Exhibit 5: This was a small square of green nylon.
 Exhibit 6: After performing tests on it, this substance was discovered to be iodine.
 Exhibit 7: This was a footprint found in dirt that was 12 inches long, 4.5 inches wide, and seemed to be a skating shoe. The size also indicates it was likely a male's print.
 Exhibit 8: This was a patch of blood that was found to be type A+, which is the same as Tyrese Jefferson's, Courtney Smith's, and Jeb Sampson's.
 Exhibit 9: Exhibit nine was many strands of short hair, which, under the inspection of a microscope, were found to belong to Tyson, a dog.

 Exhibit 10: The final piece of evidence was that of a latent fingerprint that had to be lifted using graphite. Even though this was somewhat difficult to see, it was most likely an ulnar loop.

Analysis:
After studying and analyzing the found evidence my group and I came up with a solid theory on what happened at this crime scene:
As was stated in her profile, Tyrese Jefferson was a counselor; Smokey Johnson was one of her patients with mental problems. Unfortunately, he became obsessed with her to the point of stalking her; the footprint in the dirt was from him looking into her house from under a window, which also had his fingerprint on it. She finally gets a restraining order on Smokey, which enrages him. One night, Tyrese came home from a party; after taking off her earrings and a shoe, she sees a shady figure approaching her home. She tries the phone to call for help, but realizes the line has been cut and quickly scribbles a note saying, "Someone please help me." Smokey forcibly enters her home and assaults her, bludgeoning her on the head, which is where the splotch of blood came from, ripping off a piece of green nylon from her dress in the struggle, and knocking her earring off the table and bending its post. Smokey writes the note, gloating that, "You will never find her,", and since she is unconscious from being hit on the head, takes her from her home.
Additional Information:
1. Tyrese's fingerprint was left on her earring.
2. Smokey left Tyrese's iodine behind, which she needs for her thyroid glands to produce hormones for her metabolism, since, as said in her profile, she has thyroid problems.
3. The dog hair left behind in Tyrese's home was from when she watched Tyson for a neighbor earlier that day.
Scene 3 Background: This took place at a break-in of a residence.
Exhibit 1: The first piece of evidence was a black, size 8 shoe with a 3.25 inch heel (8.5 centimeters).


Exhibit 3A: Ulnar loop fingerprints were found that match up with Tyrese Jefferson and Sandra O'Connor.
Exhibit 3: This was a plain whorl print that matched with Smokey Johnson.


Analysis:
After studying and analyzing the found evidence my group and I came up with a solid theory on what happened at this crime scene:
As was stated in her profile, Tyrese Jefferson was a counselor; Smokey Johnson was one of her patients with mental problems. Unfortunately, he became obsessed with her to the point of stalking her; the footprint in the dirt was from him looking into her house from under a window, which also had his fingerprint on it. She finally gets a restraining order on Smokey, which enrages him. One night, Tyrese came home from a party; after taking off her earrings and a shoe, she sees a shady figure approaching her home. She tries the phone to call for help, but realizes the line has been cut and quickly scribbles a note saying, "Someone please help me." Smokey forcibly enters her home and assaults her, bludgeoning her on the head, which is where the splotch of blood came from, ripping off a piece of green nylon from her dress in the struggle, and knocking her earring off the table and bending its post. Smokey writes the note, gloating that, "You will never find her,", and since she is unconscious from being hit on the head, takes her from her home.
Additional Information:
1. Tyrese's fingerprint was left on her earring.
2. Smokey left Tyrese's iodine behind, which she needs for her thyroid glands to produce hormones for her metabolism, since, as said in her profile, she has thyroid problems.
3. The dog hair left behind in Tyrese's home was from when she watched Tyson for a neighbor earlier that day.
Part IX: Poison Analysis
1. Poison Definition: a substance that when introduced into or absorbed by a living organism, causes death or injury, especially one that kills by rapid action
2. Common Poison Sources:
1. Animals: jellyfish, scorpion, snakes, frogs
2. Plants: daffodil bulbs, monkshood roots, rhubarb leaf blade, yew berries, hemlock
3. Household Cleaners: antifreeze, bleach, mothballs
4. Medicines: One can be poisoned by many medicines if they are used in incorrect doses.
5. Food: Food may be infested with bacteria, viruses, or parasites, along with improperly prepared exotic foods.
3. How do crime labs handle poison cases?
Forensic toxicologists handle these cases by analyzing biological specimens and determining what substances have been ingested, along with the amount of it.
4. What are some signs of poisoning?
1. enlarged or shrinking pupils
2. drooling or an excessively dry mouth
3. increased or decreased heart rate
4. increased or decreased breathing rate
5. pain
6. hyperactivity
7. sluggishness or deliriousness
Lab
In this study's lab section, there was once again six stations with several substances set up at each of them. We had to use assorted materials to determine which one contained a given poison.
1. Metal Poisons:
Unknown 1: This was found to contain lead (Pb) because it formed a yellow precipitate when KI was added.
Unknown 2: It turned blood red after adding KCSN, indicating it had iron (Fe) in it.
Unknown 3: This contained no chromium (Cr), iron, or lead.
 2. Sugar:
If one of these had contained sugar, which none of them did, it would have turned purple with purple Benedict solution.
 3. Household Ammonia:
Unknown 1: This contained ammonia because it had a pH over 7 (11), had an odor, and turned purple-pink with phenolphthalein.
Unknown 2 and 3: These both had a pH of 8, no odor, and the former was clear with phenolphthalein, while the later turned yellow.
 4. Aspirin:
Unknown 1: We knew this one contained aspirin because it had a pH below 7 (1.5) and turned yellow with bromothymol blue.
Unknown 2: This did not have aspirin because its pH was 8 and turned blue with bromothymol blue.
Unknown 3: This did not have aspirin either because its pH was 6 and became green with bromothymol blue.
5. Cyanide:
Because Unknown 2 turned blood-red when iron was added, we knew it contained cyanide, which Unknown 1 and 3 did not.
6. Iodine:
Since Unknowns 1 and 2 stayed their original colors when starch was added (yellow and red respectively), they did not contain iodine. Unknown 3, on the other hand, changed to blue-black from colorless, meaning iodine was a component in it.

2. Common Poison Sources:
1. Animals: jellyfish, scorpion, snakes, frogs
2. Plants: daffodil bulbs, monkshood roots, rhubarb leaf blade, yew berries, hemlock
3. Household Cleaners: antifreeze, bleach, mothballs
4. Medicines: One can be poisoned by many medicines if they are used in incorrect doses.
5. Food: Food may be infested with bacteria, viruses, or parasites, along with improperly prepared exotic foods.
3. How do crime labs handle poison cases?
Forensic toxicologists handle these cases by analyzing biological specimens and determining what substances have been ingested, along with the amount of it.
4. What are some signs of poisoning?
1. enlarged or shrinking pupils
2. drooling or an excessively dry mouth
3. increased or decreased heart rate
4. increased or decreased breathing rate
5. pain
6. hyperactivity
7. sluggishness or deliriousness
Lab
In this study's lab section, there was once again six stations with several substances set up at each of them. We had to use assorted materials to determine which one contained a given poison.
1. Metal Poisons:
Unknown 1: This was found to contain lead (Pb) because it formed a yellow precipitate when KI was added.
Unknown 2: It turned blood red after adding KCSN, indicating it had iron (Fe) in it.
Unknown 3: This contained no chromium (Cr), iron, or lead.

If one of these had contained sugar, which none of them did, it would have turned purple with purple Benedict solution.

Unknown 1: This contained ammonia because it had a pH over 7 (11), had an odor, and turned purple-pink with phenolphthalein.
Unknown 2 and 3: These both had a pH of 8, no odor, and the former was clear with phenolphthalein, while the later turned yellow.

Unknown 1: We knew this one contained aspirin because it had a pH below 7 (1.5) and turned yellow with bromothymol blue.
Unknown 2: This did not have aspirin because its pH was 8 and turned blue with bromothymol blue.
Unknown 3: This did not have aspirin either because its pH was 6 and became green with bromothymol blue.
5. Cyanide:
Because Unknown 2 turned blood-red when iron was added, we knew it contained cyanide, which Unknown 1 and 3 did not.
6. Iodine:
Since Unknowns 1 and 2 stayed their original colors when starch was added (yellow and red respectively), they did not contain iodine. Unknown 3, on the other hand, changed to blue-black from colorless, meaning iodine was a component in it.

Part VIII: Drug Analysis
1. Cocaine:
1. Chemical Name: benzoylmethylecgonine
2. Chemical Formula: C17H21NO4
3. Average pH: 5
4. Tests: blood test, hair sample test, saliva test, urine test
2. LSD:
1. Chemical Name: Lysergic Acid Diethylamide
2. Chemical Formula: C2OH25N30
3. Average pH: 3
4. Tests: blood test, urine test, stomach content
Lab
Testing for drugs can play a key role in solving a crime, in that it can determine the cause of a victim's death. Because of this fact, this was a very important area of forensics for us to learn about, especially since drug use is increasing and becoming more common in our day-to-day lives. We used cocaine and LSD reagents, along with finding the pH of six substances set up at six stations to determine if LSD or cocaine was a component of these substances.
 Station 1:
The substance at this station contained cocaine, as shown by it turning blue with the cocaine indicator. It also had a pH of 5.5, meaning the pH strip turned light orange.

 Station 2:
This also had a positive cocaine test, and in turn, a negative LSD test, which means it did not turn yellow. Its pH was 9 and the strip blue.

 Station 3: This is the first to have had a positive LSD test; it also had a pH of 2 (red).
 Station 4:
This one was found to contain cocaine, along with having a pH of 8.5 and a green-blue pH strip.
 Station 5:
Once again, there was a positive cocaine test and a negative LSD one; the pH was 5 (orange pH strip).
 Station 6:
This time, there was a positive LSD test and the pH was 3.5, which also means the pH strip turned orange-red.

1. Chemical Name: benzoylmethylecgonine
2. Chemical Formula: C17H21NO4
3. Average pH: 5
4. Tests: blood test, hair sample test, saliva test, urine test
2. LSD:
1. Chemical Name: Lysergic Acid Diethylamide
2. Chemical Formula: C2OH25N30
3. Average pH: 3
4. Tests: blood test, urine test, stomach content
Lab
Testing for drugs can play a key role in solving a crime, in that it can determine the cause of a victim's death. Because of this fact, this was a very important area of forensics for us to learn about, especially since drug use is increasing and becoming more common in our day-to-day lives. We used cocaine and LSD reagents, along with finding the pH of six substances set up at six stations to determine if LSD or cocaine was a component of these substances.

The substance at this station contained cocaine, as shown by it turning blue with the cocaine indicator. It also had a pH of 5.5, meaning the pH strip turned light orange.


This also had a positive cocaine test, and in turn, a negative LSD test, which means it did not turn yellow. Its pH was 9 and the strip blue.


This one was found to contain cocaine, along with having a pH of 8.5 and a green-blue pH strip.

Once again, there was a positive cocaine test and a negative LSD one; the pH was 5 (orange pH strip).

This time, there was a positive LSD test and the pH was 3.5, which also means the pH strip turned orange-red.

Part VII: Create a Profile Activity
This activity, in a way, seemed like preparation for the final crime scene at the end of our forensics study, in that were were given a series of clues and left to piece together an analysis of what we believed happened in the crime. The clues were as follows:
1. Fingerprints: We could tell that the right hand left this set of prints, except the pinky was did not leave one. The thumb was a plain whorl, the index and middle fingers were central-pocket whorls, while the ring finger was a radial loop.
 2. Hair: This was determined to be Asian hair.
 3. Note: On a note that was torn into many pieces was a note, on which was written, "You will never find her," meaning the criminal kidnapped or murdered a female.
 4. Hair: This hair was found to be that of a Caucasian person.
 5. Red/Pink Splotch: This was an unknown red liquid; since there was no more information given about it or ways to test it beyond examination under a microscope, we couldn't determine exactly what it was. It didn't seem to be blood, but may have been smeared lip gloss, paint, or many other things.

Analysis: With this little information, it is difficult to tell what truly happened at this crime scene. The Caucasian or Asian person may have been the attacker, while the other was that person's victim. The prints may have been lifted from the note the criminal left behind, and the red smear could have been from the victim's lip gloss if she been attacked and knocked-down face first, leaving a lip smear on whatever she had fallen on.
1. Fingerprints: We could tell that the right hand left this set of prints, except the pinky was did not leave one. The thumb was a plain whorl, the index and middle fingers were central-pocket whorls, while the ring finger was a radial loop.


Analysis: With this little information, it is difficult to tell what truly happened at this crime scene. The Caucasian or Asian person may have been the attacker, while the other was that person's victim. The prints may have been lifted from the note the criminal left behind, and the red smear could have been from the victim's lip gloss if she been attacked and knocked-down face first, leaving a lip smear on whatever she had fallen on.
Thursday, December 1, 2011
Part VI: Footprint Analysis
To start this class experiment off, in my group of four, each person in turn made a footprint in the dirt provided. We then, after each person, took note of the print's length, width, and in the case of the people wearing heeled shoes, depth. The next part was to analyze the print, meaning examining for tread pattern or any other distinguishing features. We also made sure to include time the print was taken, climate, humidity, wind speed and direction, time of last precipitation, and substrate, which in this case was dirt. In my group, since we're all females, we had to borrow the data from a male's print for comparison. Knowing if a print belongs to a male or female would be simple in most cases since the male's was much larger.

 |
| First Print Analysis |

Wednesday, November 30, 2011
Part V: Witness Experiment
Since having a keen memory can play such a crucial role in finding a criminal, we tested our own memories in class. The first thing we did was cut images of people's faces out of a magazine; my group also had to make sure all of our pictures were of a similar size and appearance. We then cut out each individual facial feature, separated them, and each group member had to re-assemble the faces using their memories.As each of us successfully completed this task, we may make good witnesses and be able to clearly recall a suspect's face or appearance.
 |
| Re-assembled Image |
Part IV: Lip Analysis
One of the class experiments we did was that of lip analysis. The first step of this process was for everyone to apply lipstick. We then pressed our mouths to a note card and took note of the lips' distinguishing features. Some of the key things to look for are if the lips are healthy (chapped, cut, etc.), the grooves in the lip, curvature of the mouth, and if the upper of lower lip is larger. The next activity in lip analysis we did once again involved applying lipstick but then pressing the prints onto paper with everyone else in our group's. We then exchanged papers with another group, and similarly to in the check forgery activity, were given the original prints for comparison and to match up the prints with the proper person. My group was able to correctly identify all samples by examining the prints looking for the previously mentioned distinguishing characteristics.
 |
| Original Lip Print |
Tuesday, November 29, 2011
Part III: Handwriting Analysis
1. History of Handwriting Analysis:
In handwriting analysis, there exists two sharply differing schools of thought: that of graphology and that which most modern forensic scientists ascribe to, which deems graphology to be scientifically invalid. Graphology is handwriting analysis used to assess personality, dating back to Confucius, who stated, "Beware of the man whose writing sways like a reed in the wind." The first detailed work on graphology was in 1622, when in his A Method to Recognize the Nature and Quality of a Writer from His Letters, Italian physician Camillo Baldi said, basically, that every person's handwriting is entirely unique to themselves and cannot be perfectly imitated, which is still handwriting analysis' guiding principle today. In the next three centuries, investigators attempted to solidify the validity of graphology, linking it to Gestalt psychology, believing that, as handwriting stems from the brain, reveals the writers' mentality. They claimed that everything from pressure, speed, interruptions, and angle of letters could be measured to establish a psychological profile of the writer.Modern forensic scientists, for the most part, though, believe graphology to be mere pseudoscience. It has, however, been used in tandem with other techniques, such as the case of the "Mad Bomber" of New York City. Much more commonly, though, handwriting analysis is used either to authenticate documents or link a suspect's handwriting with that on a ransom note, for example.
2. 12 Handwriting Characteristics:
1. Line Quality: See if the lines are smooth and flowing or shaky and wavering. This can also be used to determine speed with which the document was written.
2. Spacing of Words and Letters: Check if the spacing between letters and words is consistent.
3. Ratio of the Relative Height, Width, and Size of Letters
4. Pen Lifts and Separations: Is there a pause in writing to form new letters and words?
5. Connecting Strokes: Look if capitals are connected to lowercase letters.
6. Beginning and Ending Strokes: Are they straight, curled, long, short, an upstroke, or a downstroke?
7. Unusual Letter Formation: Are there any backwards letters or tails?
8. Shading or Pen Pressure: Is pressure on down or upstrokes?
9. Slant: Does it slant left, right, up, or down? Is it consistent?
10. Baseline Habits: Is the writing above, on, or below the line?
11. Flourishes and Embellishments
12. Diacritic Placement: How are the t's crossed or i's and j's dotted? Are the dots to the left or right of the letter?
3. Handwriting Analysis Template:
The person doing the freehand forgery of my handwriting wrote much smoother and slower than mine, particularly with the cursive. The space between the forgery's words was also inconsistent and tilted on the line, which both differ from my own writing. On the other hand, with tracing the forgery was nearly identical. They both seem to have been written quickly and slanted to the right for the print, while the cursive both appeared shaky and the cursive "m" had a bump in the right side. I believe that the tracing was much easier, but since two pieces shouldn't look exactly the same, it may raise suspicions if the forgery is too perfect.

4. Reflection on Check Forgery Activity:
To start this activity off, we each filled out a fake check using a false name; these checks were then torn into many pieces and exchanged with another group's checks. We were also given the people in the other group's Handwriting Analysis Templates for comparison and identification of who wrote which check. The first part was, of course, to re-assemble to ripped-apart checks. We then simply compared them to their Handwriting Analysis Templates; everyone in my group properly identified which check matched up with who. The characteristics that were most distinguishing in the check I analyzed were the slight slant of letters to the right, the light pressure, and that all of the letters and words were very close together.
5. Famous Case Using Handwriting Analysis:
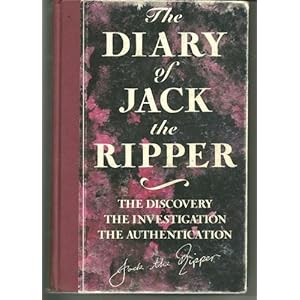
In 1992, Michael Barrett, an unemployed man in Liverpool came forth with a diary supposedly written by Jack the Ripper that he claimed was given to him by friend Tony Devereux in a pub. When this was questioned, the story changed to that Barrett's wife, Ann, had had it in her family for as long as she could remember. Even through this, it was published as The Diary of Jack the Ripper in 1993. Tests were performed on the diary's ink but with no definitive conclusions. Then, document expert Kenneth W. Rendell examined the diary and found that the writing was not Victorian in style and saw many handwriting inconsistencies. This, along with some further testing, caused Michael Barrett to confess that he authored the documents while his wife wrote everything out.
In handwriting analysis, there exists two sharply differing schools of thought: that of graphology and that which most modern forensic scientists ascribe to, which deems graphology to be scientifically invalid. Graphology is handwriting analysis used to assess personality, dating back to Confucius, who stated, "Beware of the man whose writing sways like a reed in the wind." The first detailed work on graphology was in 1622, when in his A Method to Recognize the Nature and Quality of a Writer from His Letters, Italian physician Camillo Baldi said, basically, that every person's handwriting is entirely unique to themselves and cannot be perfectly imitated, which is still handwriting analysis' guiding principle today. In the next three centuries, investigators attempted to solidify the validity of graphology, linking it to Gestalt psychology, believing that, as handwriting stems from the brain, reveals the writers' mentality. They claimed that everything from pressure, speed, interruptions, and angle of letters could be measured to establish a psychological profile of the writer.Modern forensic scientists, for the most part, though, believe graphology to be mere pseudoscience. It has, however, been used in tandem with other techniques, such as the case of the "Mad Bomber" of New York City. Much more commonly, though, handwriting analysis is used either to authenticate documents or link a suspect's handwriting with that on a ransom note, for example.
 |
| Camillo Baldi's work |
2. 12 Handwriting Characteristics:
1. Line Quality: See if the lines are smooth and flowing or shaky and wavering. This can also be used to determine speed with which the document was written.
2. Spacing of Words and Letters: Check if the spacing between letters and words is consistent.
3. Ratio of the Relative Height, Width, and Size of Letters
4. Pen Lifts and Separations: Is there a pause in writing to form new letters and words?
5. Connecting Strokes: Look if capitals are connected to lowercase letters.
6. Beginning and Ending Strokes: Are they straight, curled, long, short, an upstroke, or a downstroke?
7. Unusual Letter Formation: Are there any backwards letters or tails?
8. Shading or Pen Pressure: Is pressure on down or upstrokes?
9. Slant: Does it slant left, right, up, or down? Is it consistent?
10. Baseline Habits: Is the writing above, on, or below the line?
11. Flourishes and Embellishments
12. Diacritic Placement: How are the t's crossed or i's and j's dotted? Are the dots to the left or right of the letter?
3. Handwriting Analysis Template:
The person doing the freehand forgery of my handwriting wrote much smoother and slower than mine, particularly with the cursive. The space between the forgery's words was also inconsistent and tilted on the line, which both differ from my own writing. On the other hand, with tracing the forgery was nearly identical. They both seem to have been written quickly and slanted to the right for the print, while the cursive both appeared shaky and the cursive "m" had a bump in the right side. I believe that the tracing was much easier, but since two pieces shouldn't look exactly the same, it may raise suspicions if the forgery is too perfect.

4. Reflection on Check Forgery Activity:
To start this activity off, we each filled out a fake check using a false name; these checks were then torn into many pieces and exchanged with another group's checks. We were also given the people in the other group's Handwriting Analysis Templates for comparison and identification of who wrote which check. The first part was, of course, to re-assemble to ripped-apart checks. We then simply compared them to their Handwriting Analysis Templates; everyone in my group properly identified which check matched up with who. The characteristics that were most distinguishing in the check I analyzed were the slight slant of letters to the right, the light pressure, and that all of the letters and words were very close together.
5. Famous Case Using Handwriting Analysis:
In 1992, Michael Barrett, an unemployed man in Liverpool came forth with a diary supposedly written by Jack the Ripper that he claimed was given to him by friend Tony Devereux in a pub. When this was questioned, the story changed to that Barrett's wife, Ann, had had it in her family for as long as she could remember. Even through this, it was published as The Diary of Jack the Ripper in 1993. Tests were performed on the diary's ink but with no definitive conclusions. Then, document expert Kenneth W. Rendell examined the diary and found that the writing was not Victorian in style and saw many handwriting inconsistencies. This, along with some further testing, caused Michael Barrett to confess that he authored the documents while his wife wrote everything out.
Sunday, November 27, 2011
Part II: Hair and Fiber Analysis
1. History of Hair/Fiber Analysis:
One of the first scientific reports involving trichology, which is the study of hair, was published in France in 1857. Forensic hair/fiber analysis then developed into an established science in the early 1900s. In 1931, Scottish forensic scientist John Glaister published his Hairs of Mammalia from the Medico-legal Aspect, and then in 1937 his A Study of Hairs and Wools Belonging to the Mammalian Group of Animals, Including a Special Study of Human Hair, which, affirmed the accuracy of hair/fiber analysis and made him a world-renowned resource in the field. Then, in 1977, John Hicks' Microscopy of Hairs: A Practical Guide and Manual detailed the process of analyzing hair/fiber evidence for forensic examiners.
2. Parts of a Complete Hair:

3. Major Types of Fibers:
Cashmere: This is a type of animal fiber made from the cashmere goat in the goats' molting season when they naturally shed. Its fine, soft fibers give excellent insulation without being bulky, and it comes naturally in shades of grey, brown, and white. The fibers are also very adaptable and easily spun into yarn.
Silk: This is a natural protein fiber which contains 70-75% fiber fibroin that is secreted from the two salivary glands on the top of silkworm larva's head and 25-30%, which is a gum that cements the filaments together. This has a natural luster and naturally is a shiny white or cream color.
Linen: This is a plant fiber created from the stalk of the flax plant that has two to three times cotton's strength, making it the strongest of all vegetable fibers. It is highly absorbent, unyielding, and wrinkles easily.
Ramie: This fiber may also be known as China grass; it is naturally white, has a strong resistance to bacteria and mold, has a high absorbency, and becomes even stronger when wet. However, it is quite brittle, hence it is does not have the durability of other fibers and is best in blends.
Acrylic Fiber: This is a synthetic polymer fiber containing, at a minimum, 85% acrylonitrile. It is springy and warm, resembling an easier to care for wool. It is also non-allergenic and resistant to moths, oils, sunlight, and many chemicals.
4. Hair/Fiber Collection Techniques:
Combs, tweezers, or a filtered vacuum device to collect any evidence found at the crime scene. In the case of rape with a live victim, the CSI unit accompanies the victim to a hospital for medical examination to obtain hair or fiber found in the examination. During an autopsy, the pathologist will also scrape under the victim's fingernails to find any hair or fiber remaining there; this can indicate whether there was a violent struggle where the victim pulled at the assailant's hair.
5. Typical Hair/Fiber Analysis:
Forensic scientists typically use a Scanning Electron Microscope to determine the species, race, and somatic origin of the hair. They may then test for DNA on the hair's follicular tag and test for drugs and environmental toxins. Hair absorbs metabolized drugs that are sent into the hair follicle through the blood stream. This can be used to detect many recreational and therapeutic drugs, such as cocaine, heroin, benzodiazepines, and amphetamines. Forensic toxicologist may also search for toxic metals in hair to explain poor psychological or physical health. Nuclear and mitochondrial DNA can be extracted from hair roots to help identify the victim or suspect since this DNA comes from one's parents, though mitochondrial DNA only comes from the mother.
 A polarizing light microscope is primarily used for fiber analysis. Using this and assorted oils, forensic scientists can examine a fiber's color, thickness, and composition. Microspectrophotometry may be utilized to discern colors in ultraviolet, as well. Physical torn fabric matches and impressions left from the fabric contacting a hard surface are used, too. An example of this would be if a corduroy impression from a victim's clothes is left in the paint of a suspect's vehicle.

6. Reliability of Hair/Fiber Data:
While data from hair/fiber analysis can be very informative, results are rarely seen as conclusive. This is particularly the case with fiber. Though DNA extracted from hair is accurate, fiber must be matched up with a suspect by means of statistical elimination.
7. Notable/Famous Case Where Hair/Fiber Were Used:
Hair analysis played a crucial role in the case of James Driskell who was wrongfully charged with the 1991 murder of Perry Harder in Winnipeg, Canada. Harder had last been seen outside of his house in a pick-up truck. Three months after his disappearance, Harder's body was found in a shallow grave and had been shot at least once. Harder and Driskell had been charged previously with possessing stolen goods; it was thought that Driskell would have murdered Harder in order to prevent Harder from testifying against him. The only evidence obtained against Driskell was the presence of three hairs in his van that supposedly belonged to Harder. DNA testing later proved this to be entirely false, which made the procedure of visual hair analysis obsolete. Driskell had been freed since 2003 after his serving for twelve years in Stony Mountain Penitentiary for first-degree murder. His lawyers were James Lockyer and Alan Libman, both defense lawyers in the Assocation in Defense of the Wrongly Convicted.

One of the first scientific reports involving trichology, which is the study of hair, was published in France in 1857. Forensic hair/fiber analysis then developed into an established science in the early 1900s. In 1931, Scottish forensic scientist John Glaister published his Hairs of Mammalia from the Medico-legal Aspect, and then in 1937 his A Study of Hairs and Wools Belonging to the Mammalian Group of Animals, Including a Special Study of Human Hair, which, affirmed the accuracy of hair/fiber analysis and made him a world-renowned resource in the field. Then, in 1977, John Hicks' Microscopy of Hairs: A Practical Guide and Manual detailed the process of analyzing hair/fiber evidence for forensic examiners.
2. Parts of a Complete Hair:
3. Major Types of Fibers:
Cashmere: This is a type of animal fiber made from the cashmere goat in the goats' molting season when they naturally shed. Its fine, soft fibers give excellent insulation without being bulky, and it comes naturally in shades of grey, brown, and white. The fibers are also very adaptable and easily spun into yarn.
 |
| Cashmere Goat |
 |
| Cashmere Fiber |
 |
| Silk Fiber |
 |
| Linen Fiber |
 |
| Ramie Fiber |
 |
| Acrylic Fiber |
4. Hair/Fiber Collection Techniques:
Combs, tweezers, or a filtered vacuum device to collect any evidence found at the crime scene. In the case of rape with a live victim, the CSI unit accompanies the victim to a hospital for medical examination to obtain hair or fiber found in the examination. During an autopsy, the pathologist will also scrape under the victim's fingernails to find any hair or fiber remaining there; this can indicate whether there was a violent struggle where the victim pulled at the assailant's hair.
5. Typical Hair/Fiber Analysis:
Forensic scientists typically use a Scanning Electron Microscope to determine the species, race, and somatic origin of the hair. They may then test for DNA on the hair's follicular tag and test for drugs and environmental toxins. Hair absorbs metabolized drugs that are sent into the hair follicle through the blood stream. This can be used to detect many recreational and therapeutic drugs, such as cocaine, heroin, benzodiazepines, and amphetamines. Forensic toxicologist may also search for toxic metals in hair to explain poor psychological or physical health. Nuclear and mitochondrial DNA can be extracted from hair roots to help identify the victim or suspect since this DNA comes from one's parents, though mitochondrial DNA only comes from the mother.
 | ||
| Scanning Electron Microscope |
6. Reliability of Hair/Fiber Data:
While data from hair/fiber analysis can be very informative, results are rarely seen as conclusive. This is particularly the case with fiber. Though DNA extracted from hair is accurate, fiber must be matched up with a suspect by means of statistical elimination.
7. Notable/Famous Case Where Hair/Fiber Were Used:
Hair analysis played a crucial role in the case of James Driskell who was wrongfully charged with the 1991 murder of Perry Harder in Winnipeg, Canada. Harder had last been seen outside of his house in a pick-up truck. Three months after his disappearance, Harder's body was found in a shallow grave and had been shot at least once. Harder and Driskell had been charged previously with possessing stolen goods; it was thought that Driskell would have murdered Harder in order to prevent Harder from testifying against him. The only evidence obtained against Driskell was the presence of three hairs in his van that supposedly belonged to Harder. DNA testing later proved this to be entirely false, which made the procedure of visual hair analysis obsolete. Driskell had been freed since 2003 after his serving for twelve years in Stony Mountain Penitentiary for first-degree murder. His lawyers were James Lockyer and Alan Libman, both defense lawyers in the Assocation in Defense of the Wrongly Convicted.
Sunday, November 20, 2011
Part I: Fingerprinting
1. History of Fingerprinting:
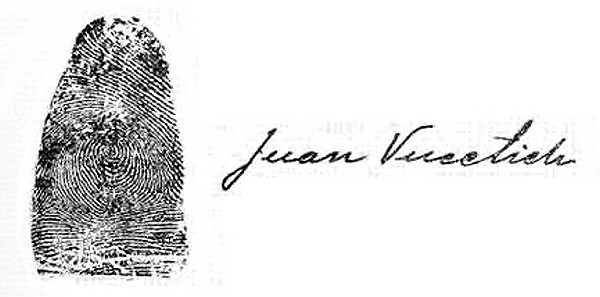
Though fingerprints were not used as unique identifiers until more recent times, they were used in ancient Babylon, China, and Japan to prevent forgery, keep records of crimes, and authenticate important documents. Centuries later, in 1684, English scientist Nehemiah Grew was the first to publish papers on the ridge structure of fingerprints while Scottish surgeon, Dr. Henry Faulds,was the first person to publish papers on the usefulness of fingerprints for identification. Then, Argentine police officer, Juan Vucetich was first to file and record individuals' fingerprints and later created the world's first fingerprint bureau. In 1902, the case of murderer Scheffer was the first time fingerprints were used to arrest and convict a criminal. A year afterward, Alphonse Bertillon created a way of pulling fingerprints off of smooth surfaces.
2. Types of Fingerprints:
1. Direct/Patent/Exemplar: These are obvious to the human eye and are caused by foreign material being transported from a finger to the solid surface. Some common ones are from flour, wet clay, ink, dirt, or blood.
2. Latent: As latent means "hidden" or "invisible", these prints are seen using electronic, physical, or chemical processing techniques. These may show only a portion of the fingerprint and may be smudged and unclear.With these factors, it is very easy to err in identification with these prints.

3. Plastic: These occur when a print's impression is left in a material that retains the friction ridge's shape. A perfect plastic print would be left in a lump of wet clay, though this is uncommon because few criminals would be so foolish. They are most commonly seen in melted candle wax, putty removed from a window pane's perimeter, or in the grease of car parts. These are easily seen with no enhancement, but one must be careful to not overlook accomplice's latent prints, as well.

4. Electronic: There was one reported instance of a criminal selling stolen watches and sending their images via cell phone; these images included his prints seen in enough detail for him to be identified by the police.

3. Techniques/Chemicals Used to Develop Prints:
Prints are typically lifted from hard, smooth or nonabsorbent surfaces via the usage of powder while prints on soft and porous surfaces are developed using chemical treatments.
Powders:The powder chosen should always show the most contrast with the surface to be examined. Many find black and gray powders to be satisfactory for lifting most latent prints. The black, which consists of carbon or charcoal is applied to light-colored surfaces; the gray, made up of aluminum dust is used on dark-colored surfaces, along with mirrors and polished metals due to the fact that they will photograph black. These are lightly applied with either a fiberglass or camel-hair brush and stick to residues of left behind body oils. Another way is with magnetic-sensitive powder, which is used on magnets using a Magna Brush. This decreases the chance of damaging prints because this type of brush does not have surface-touching bristles. Another method is the usage of fluorescent powders, which fluoresce under ultraviolet light.

Chemicals:The oldest method is that of iodine fuming, which is based on the sublimation of iodine. Iodine is a solid crystal that when heated is transformed directly into a vapor, entirely skipping the liquid phase. The material under inspection is typically placed in an enclosed cabinet along with the iodine crystals and heated, wherein the iodine vapors combine with the constituents of the latent print and are made visible. However,they are visible only temporarily and must be doused with a 1% solution of starch in water, which will then last from several weeks to several months. Another common chemical utilized is silver nitrate, which, after application, is developed with ultraviolet light. This is possible due to the chemical reaction between sodium chloride and silver nitrate which forms the colorless silver chloride.After a 3% solution is brushed onto this, the print will appear as a reddish-brown or black color. Ninhydrin (also known as triketohydrinene hydrate) depends on the chemical reaction to form purplish-blue color from the amino acids present in trace amounts of perspiration. A 0.6% ninhydrin powder solution with a fitting solvent, such as acetone or ethyl alcohol, is sprayed onto the surface. The prints appear within a couple of hours and can be quickened by heating. Another way is Super Glue Fuming; super glue is 98 to 99% comprised of cyanoacrylate ester, which interacts with and visualizes a latent print. The fumes may be created by daubing the super glue onto absorbent cotton that has been treated with sodium hydroxide or heating. These are encased in a chamber for roughly six hours and should produce a white print.
4. Shapes/Patterns:
Prior to computerization, manual fingerprint classification systems were used, three of the most popular being the Roscher, Juan Vucetich, and Henry classification systems. The first was developed and used in both Germany and Japan, the second was made by a previously mentioned Argentine police officer, and the final was created in India and implemented throughout most English-speaking countries. In the Henry system there are the following three major fingerprint categories:
Loops: These constitute 60-65% of prints and may be broken down into radial and ulnar loops, the former starting on the thumb-side of the finger (closer to the radius) and the latter starting on the pinky-side (closer to the ulna).
Whorls: Whorls are 30-35% of all prints and are broken down into plain, accidental, double-loop, peacock's eye, and central-pocket loop whorls.
Arches: These are 5% of prints and are divided into plain or tented arches.
Fingerprints may also be given number values. The system consists of five fractions in which r stands for right, l for left, i for index finger, m for middle finger, t for thumb, r for ring finger, and p for pinky. The pattern of fractions is the following:
Ri/Rt + Rr/Rm + Lt/Rp + Lm/Li + Lp/Lr. For whorls, the first fraction is given a sixteen, the second an 8, then 4, then a 2, and finally a zero. All arches and loops are given zeroes. The numerator's and denominator's are added up using the following formula:
(Ri + Rr + Lt + Lm + Lp)/(Rt + Rm + Rp + Li + Lr). A one is then added to the top of these to prevent dividing by zero. In this example, the right ring finger and left index finger have whorls:
0/0 + 8/0 + 0/0 + 0/2 + 0/0 + 1/1, and the calculation: (0 + 8 + 0 + 0 + 0 + 1)/(0 + 0 + 0 + 2 + 0 + 1) = 9/3 = 3. This system reduces the number of prints needed to be compared, allowing one to only need to compare sets with matching numbers.
Though fingerprints were not used as unique identifiers until more recent times, they were used in ancient Babylon, China, and Japan to prevent forgery, keep records of crimes, and authenticate important documents. Centuries later, in 1684, English scientist Nehemiah Grew was the first to publish papers on the ridge structure of fingerprints while Scottish surgeon, Dr. Henry Faulds,was the first person to publish papers on the usefulness of fingerprints for identification. Then, Argentine police officer, Juan Vucetich was first to file and record individuals' fingerprints and later created the world's first fingerprint bureau. In 1902, the case of murderer Scheffer was the first time fingerprints were used to arrest and convict a criminal. A year afterward, Alphonse Bertillon created a way of pulling fingerprints off of smooth surfaces.
2. Types of Fingerprints:
1. Direct/Patent/Exemplar: These are obvious to the human eye and are caused by foreign material being transported from a finger to the solid surface. Some common ones are from flour, wet clay, ink, dirt, or blood.
2. Latent: As latent means "hidden" or "invisible", these prints are seen using electronic, physical, or chemical processing techniques. These may show only a portion of the fingerprint and may be smudged and unclear.With these factors, it is very easy to err in identification with these prints.
3. Plastic: These occur when a print's impression is left in a material that retains the friction ridge's shape. A perfect plastic print would be left in a lump of wet clay, though this is uncommon because few criminals would be so foolish. They are most commonly seen in melted candle wax, putty removed from a window pane's perimeter, or in the grease of car parts. These are easily seen with no enhancement, but one must be careful to not overlook accomplice's latent prints, as well.
4. Electronic: There was one reported instance of a criminal selling stolen watches and sending their images via cell phone; these images included his prints seen in enough detail for him to be identified by the police.
3. Techniques/Chemicals Used to Develop Prints:
Prints are typically lifted from hard, smooth or nonabsorbent surfaces via the usage of powder while prints on soft and porous surfaces are developed using chemical treatments.
Powders:The powder chosen should always show the most contrast with the surface to be examined. Many find black and gray powders to be satisfactory for lifting most latent prints. The black, which consists of carbon or charcoal is applied to light-colored surfaces; the gray, made up of aluminum dust is used on dark-colored surfaces, along with mirrors and polished metals due to the fact that they will photograph black. These are lightly applied with either a fiberglass or camel-hair brush and stick to residues of left behind body oils. Another way is with magnetic-sensitive powder, which is used on magnets using a Magna Brush. This decreases the chance of damaging prints because this type of brush does not have surface-touching bristles. Another method is the usage of fluorescent powders, which fluoresce under ultraviolet light.
Chemicals:The oldest method is that of iodine fuming, which is based on the sublimation of iodine. Iodine is a solid crystal that when heated is transformed directly into a vapor, entirely skipping the liquid phase. The material under inspection is typically placed in an enclosed cabinet along with the iodine crystals and heated, wherein the iodine vapors combine with the constituents of the latent print and are made visible. However,they are visible only temporarily and must be doused with a 1% solution of starch in water, which will then last from several weeks to several months. Another common chemical utilized is silver nitrate, which, after application, is developed with ultraviolet light. This is possible due to the chemical reaction between sodium chloride and silver nitrate which forms the colorless silver chloride.After a 3% solution is brushed onto this, the print will appear as a reddish-brown or black color. Ninhydrin (also known as triketohydrinene hydrate) depends on the chemical reaction to form purplish-blue color from the amino acids present in trace amounts of perspiration. A 0.6% ninhydrin powder solution with a fitting solvent, such as acetone or ethyl alcohol, is sprayed onto the surface. The prints appear within a couple of hours and can be quickened by heating. Another way is Super Glue Fuming; super glue is 98 to 99% comprised of cyanoacrylate ester, which interacts with and visualizes a latent print. The fumes may be created by daubing the super glue onto absorbent cotton that has been treated with sodium hydroxide or heating. These are encased in a chamber for roughly six hours and should produce a white print.
 |
| Iodine Sublimation |
 |
| Ninhydrin |
4. Shapes/Patterns:
Prior to computerization, manual fingerprint classification systems were used, three of the most popular being the Roscher, Juan Vucetich, and Henry classification systems. The first was developed and used in both Germany and Japan, the second was made by a previously mentioned Argentine police officer, and the final was created in India and implemented throughout most English-speaking countries. In the Henry system there are the following three major fingerprint categories:
Loops: These constitute 60-65% of prints and may be broken down into radial and ulnar loops, the former starting on the thumb-side of the finger (closer to the radius) and the latter starting on the pinky-side (closer to the ulna).
 |
| Radial Loop |
 |
| Ulnar Loop |
Whorls: Whorls are 30-35% of all prints and are broken down into plain, accidental, double-loop, peacock's eye, and central-pocket loop whorls.
 |
| Plain Whorl |
 |
| Accidental Whorl |
 |
| Double-Loop Whorl |
 |
| Peacock's Eye Whorl |
 |
| Central-Pocket Loop Whorl |
Arches: These are 5% of prints and are divided into plain or tented arches.
 |
| Plain Arch |
 |
| Tented Arch |
Ri/Rt + Rr/Rm + Lt/Rp + Lm/Li + Lp/Lr. For whorls, the first fraction is given a sixteen, the second an 8, then 4, then a 2, and finally a zero. All arches and loops are given zeroes. The numerator's and denominator's are added up using the following formula:
(Ri + Rr + Lt + Lm + Lp)/(Rt + Rm + Rp + Li + Lr). A one is then added to the top of these to prevent dividing by zero. In this example, the right ring finger and left index finger have whorls:
0/0 + 8/0 + 0/0 + 0/2 + 0/0 + 1/1, and the calculation: (0 + 8 + 0 + 0 + 0 + 1)/(0 + 0 + 0 + 2 + 0 + 1) = 9/3 = 3. This system reduces the number of prints needed to be compared, allowing one to only need to compare sets with matching numbers.
Subscribe to:
Posts (Atom)